| Need a really, really cheap guitar effect enclosure? Raco electrical junction boxes are very sturdy, but there's a cheaper one. You can use steel house framing members to make even cheaper ones. And if you want even larger enclosures than you can get commercially, there are semi-structural members that will do anything from a biggish stompbox up through multi-effects enclosures and even tube amplifier chassis. See "bigger members and bigger boxes" below for that. |
|
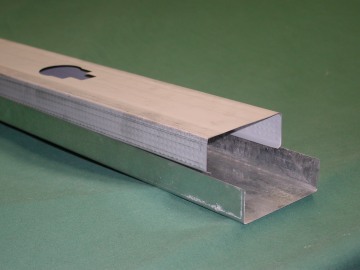
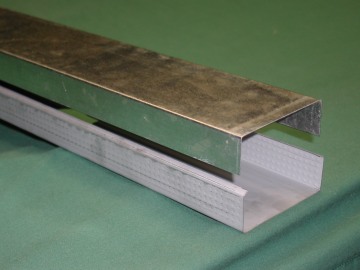
The Basic Steel Stud
This is the way the material comes from the hardware store. The actual stud is more grayish than the brightly shiny track that it fits into. In making houses, the track is fastened to the floor and the stud end fits into the inside of it. We want to use the better-looking track for the top and the stud for the bottom. The dimensions of the stud are 3.5" wide and 1.5" thick - big surprise! That's the size of today's standard "2x4" framing lumber. Here's how to make a box with a length of steel stud and track from a local hardware store. A length of steel stud and track each over eight feet long cost under US$4.00 together. You can make a ...lot... of enclosures out of eight feet of material! The cheapo tracks are thin, about 0.018" or 25 Gauge. This is only marginal for sturdiness. It is possible to get thicker studs and tracks, as well as reinforcing what's there. The ends of the track and stud are open. The easy way to fix this is to cut the stud to the exact length you need and the track longer than the finished enclosure by twice the thickness of the stud. Then you fold the ends down to make a complete box. Another use is for a long (3 feet or more!) enclosure for a number of effects, or an effects routing/switching unit. You need a length of both the stud and the mounting track material to make a box. The track fits snugly over the framing stud. The stud forms the base, the track is the pretty top cover. And here's how to make a stompbox sized enclosure out of it.
|
| Bigger
members and bigger boxes
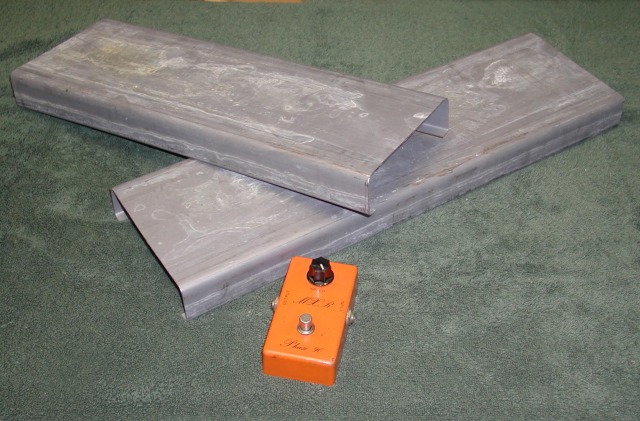
Once you get beyond simple, small stompboxes, enclosures get much harder to make. Also, 25 gauge material is just barely thick enough for a small, folded-up stompbox. I stumbled onto a company called "Unimast" that makes steel framing members for the building trades. They have distributors literally all over the US, and a directory to their outlets on their web page. A couple of phone calls led me to an insulation supply place less than eight miles from where I work that stocked their stuff. I found steel framing stock from smaller than the cheapo steel studs all the way up to stuff too heavy to carry. Even more interesting, I found that they were careless with their loading and unloading with a forklift. After some polite explanations of what I was doing and some convincing that I would not be a pain to them, they let me have a ten foot length of 1.875" by 6" 18 gauge "C" shaped framing that had been bent by accident - for free in spite of my offering to pay full retail for the damaged piece! I would not expect them to do that repeatedly, but then again, ten feet of enclosure stock is a lot of enclosures. The cost for the basic materials bought outright is not bad, either. A ten foot section like I got was only $7.50 at full price.
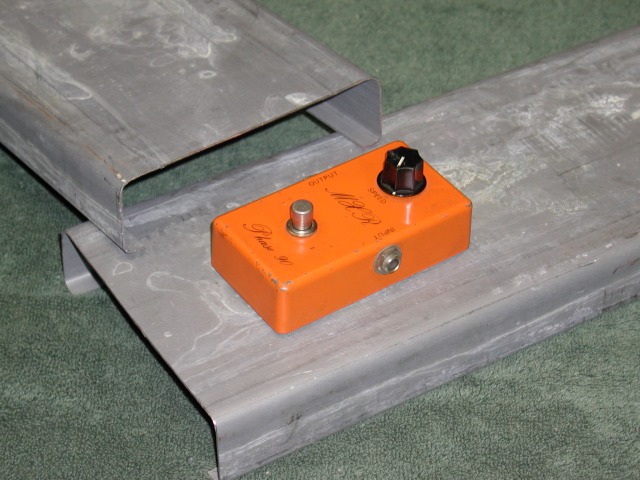
Here's what I got. I've already hacksawed out two sections from the whole length. All of the stock framing members come with oval holes a couple of inches across punched in them every 18 to 24 inches. I cut these two pieces by just cutting to the edge of the hole. The short piece is 17" long, from the end of the piece where there was a hole close to the end, and the 20" piece between the next two holes. These two pieces are going to be my prototype microprocessor controlled remote footswitch unit. The long piece with have eight switches and LED pairs mounted every 2.5" to stomp on (2.5" is about right for getting one switch between two others, which are 5" apart, and any two adjacent ones). The shorter piece will hold the remote receiver and 18 phone jacks to do eight effects loops under remote control.
Here's a closeup with an MXR Phase 90 for size reference so you can see the size and thickness better. The 6" length is a little longer than the long dimension of a Hammond 1590BB (one size up from the 1590B that the P90's in) and close to the length of the 1590C. Of course, the width is unrestricted, so you could easily make a 4" by 6" enclosure for one effect. To make a bottom and sides for these, you take a sheet of 18 gauge steel and drill it for screws to go into the 1/2" flanges on the open sides. To cover the open ends of the enclosure, you could do one of several things:
As you can see from the picture, the 18 gauge material is thick - thick enough that the pieces shown don't distort when I stand on them - and I'm a pretty big guy. This is sturdy enough to make a chassis for a tube amp, another use I intend to put it to. I still have six feet of stud left 8-) |
Making a steel stud
box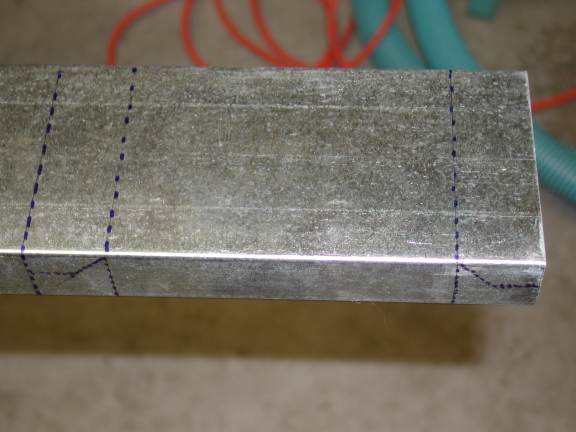
Here's the track material marked up to cut. I decided on a 5" (13cm) long box. First, I marked off the right hand end for enough material to fold down to cover the end of the box. Then I marked the sides of the right end to cut for flaps to enclose the corners. The center 5" of material will be left as is, and the left hand side is marked to make a flap to cover the other end. |
 You can see
the marking for the end flaps in this picture more clearly. I will cut
on the dotted blue lines, removing the odd-shaped pieces at either end
of the box. You can see
the marking for the end flaps in this picture more clearly. I will cut
on the dotted blue lines, removing the odd-shaped pieces at either end
of the box. |
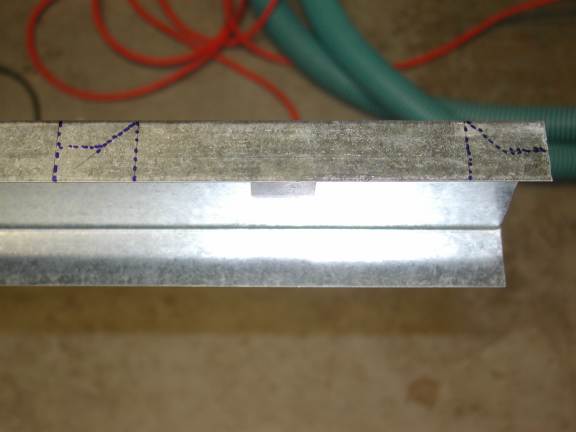
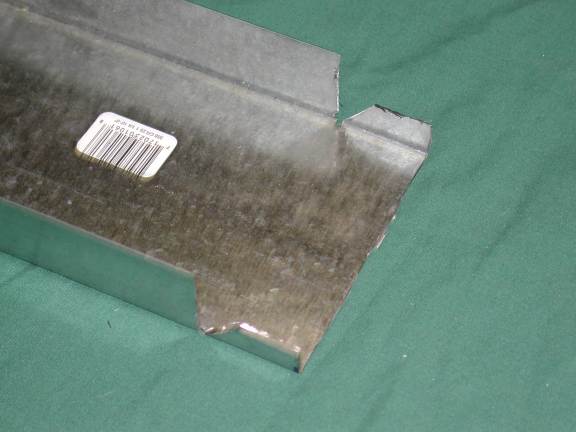
 My camera
didn't cope all that well with the reflections in this one, but it shows
more clearly where the cuts go. I've made two out of the three cuts. The
third cut will be on the dotted diagonal line. My camera
didn't cope all that well with the reflections in this one, but it shows
more clearly where the cuts go. I've made two out of the three cuts. The
third cut will be on the dotted diagonal line.
Notice that I cut a little bit into the flat top of the track. This will give some relief when I fold the flap down. I used my air-powered cutoff wheel to make these cuts, but a hacksaw will work just as well if you insert a wooden 2x4 into the inside of the track to back up the metal as you saw. Egad, I love power tools... |
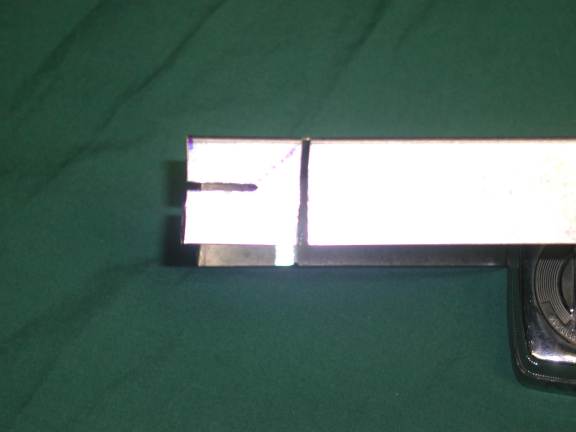
 Here's the
finished end cuts for the free end. Note that the little ragged edges
are metal burrs that are as sharp if not sharper than razor blades.
De-burr all cuts with a file or scraper; if you don't, you might as well
get out the band-aids now, because these edges will slice your hands to
shreds. Here's the
finished end cuts for the free end. Note that the little ragged edges
are metal burrs that are as sharp if not sharper than razor blades.
De-burr all cuts with a file or scraper; if you don't, you might as well
get out the band-aids now, because these edges will slice your hands to
shreds.
We will fold the flap up, completing an end on the section of track. |
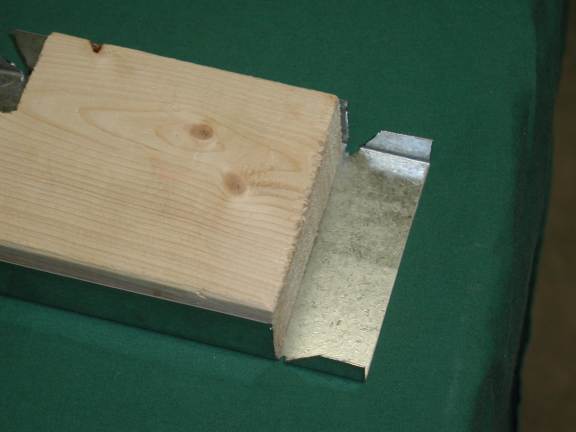 The easy way
to do that is to insert a bit of wooden 2x4, perhaps clamping the 2x4 to
the edge of your work bench with a large clamp so that you can use a
second hunk of wood from under the flap to force the flap to bend up
right at the edge of the wood. The easy way
to do that is to insert a bit of wooden 2x4, perhaps clamping the 2x4 to
the edge of your work bench with a large clamp so that you can use a
second hunk of wood from under the flap to force the flap to bend up
right at the edge of the wood. |
 If you're
careful, you wind up with something like this - well, OK, probably
better, because I was a little sloppy the first time. If you're
careful, you wind up with something like this - well, OK, probably
better, because I was a little sloppy the first time.
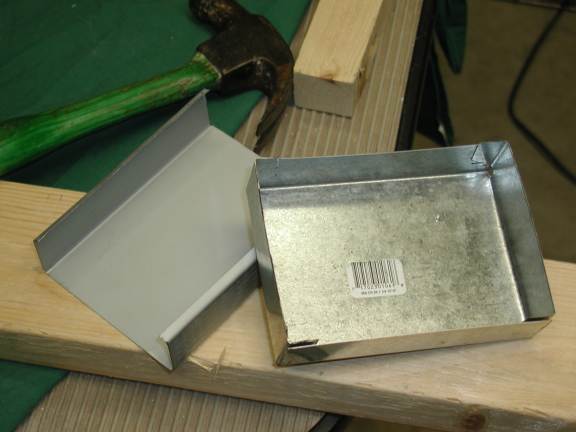
Both ends are folded up, the tabs from the sides tucked neatly inside the sides of the track, and a hunk of the steel stud just long enough to fit inside the finished cover has been cut.
|
 And it looks
like this when you fit the two together. The stud slides neatly inside
the cut and folded track. To hold the whole thing together, you go ahead
and close the whole thing up, then drill a hole for a sheet metal screw
through the four corners so that it pierces the track, inside-folded tab
on the track, and the stud. And it looks
like this when you fit the two together. The stud slides neatly inside
the cut and folded track. To hold the whole thing together, you go ahead
and close the whole thing up, then drill a hole for a sheet metal screw
through the four corners so that it pierces the track, inside-folded tab
on the track, and the stud. |
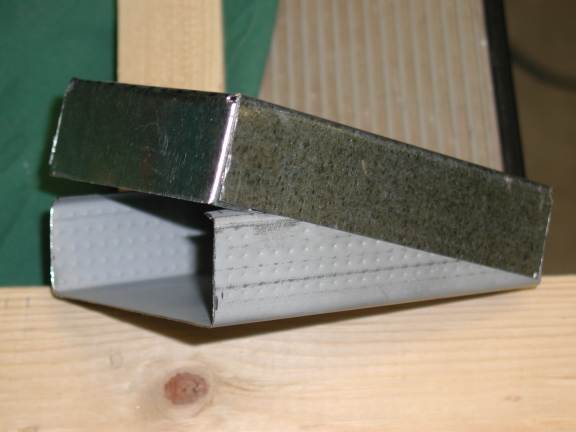
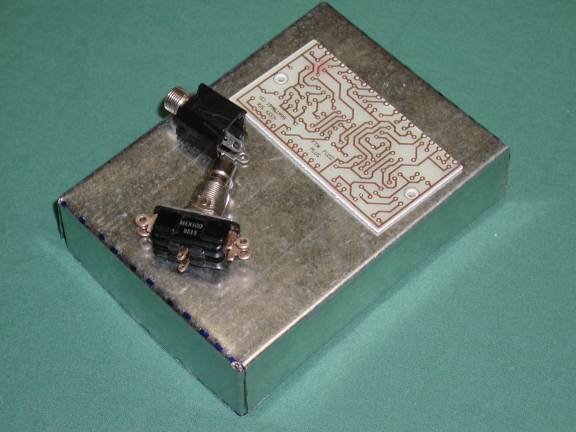 And here's
the finished box, with some typical parts thrown in for size comparison.
It's a little roomier than a Hammond 1590BB as show. And here's
the finished box, with some typical parts thrown in for size comparison.
It's a little roomier than a Hammond 1590BB as show.
Of course, you're not limited to the 5" length I chose. Sometimes a standard size box isn't enough. You could, for instance, make one enclosure three feet (!?) long, and put a whole mess of effect PCB's in it. You could use a 24" strip of this for a series of footswitches for remote effects. You could make a 10" long enclosure for something with a lot of knobs. |